Digital Takeoff
How to perform digital takeoff with ViewCompanion
Digital takeoff, also known as electronic takeoff or digital quantification, is a process in construction
and related industries where measurements and quantities from construction plans are performed digitally using specialized software.
By using specialized takeoff software, you will reduce manual errors and save valuable time.
Moreover, digital takeoff allows for more precise cost estimation and project planning by enabling real-time adjustments and
quick recalculations as project plans evolve.
To maximize the benefits, it’s essential to select software that supports a variety of file formats, such as PDF and DWF.
ViewCompanion can work with both these file formats, in addition to a number of others depending on which edition you are using.
Below you will find information about how you can perform a digital takeoff with ViewCompanion and then export a report to Excel.
How to measure areas on a floor plan
In this tutorial we will show how to do a takeoff based on a floorplan, and we want to measure the area for each room.
The picture below shows ViewCompanion displaying our floorplan with the markup tab active where you will find all the available annotations tools:
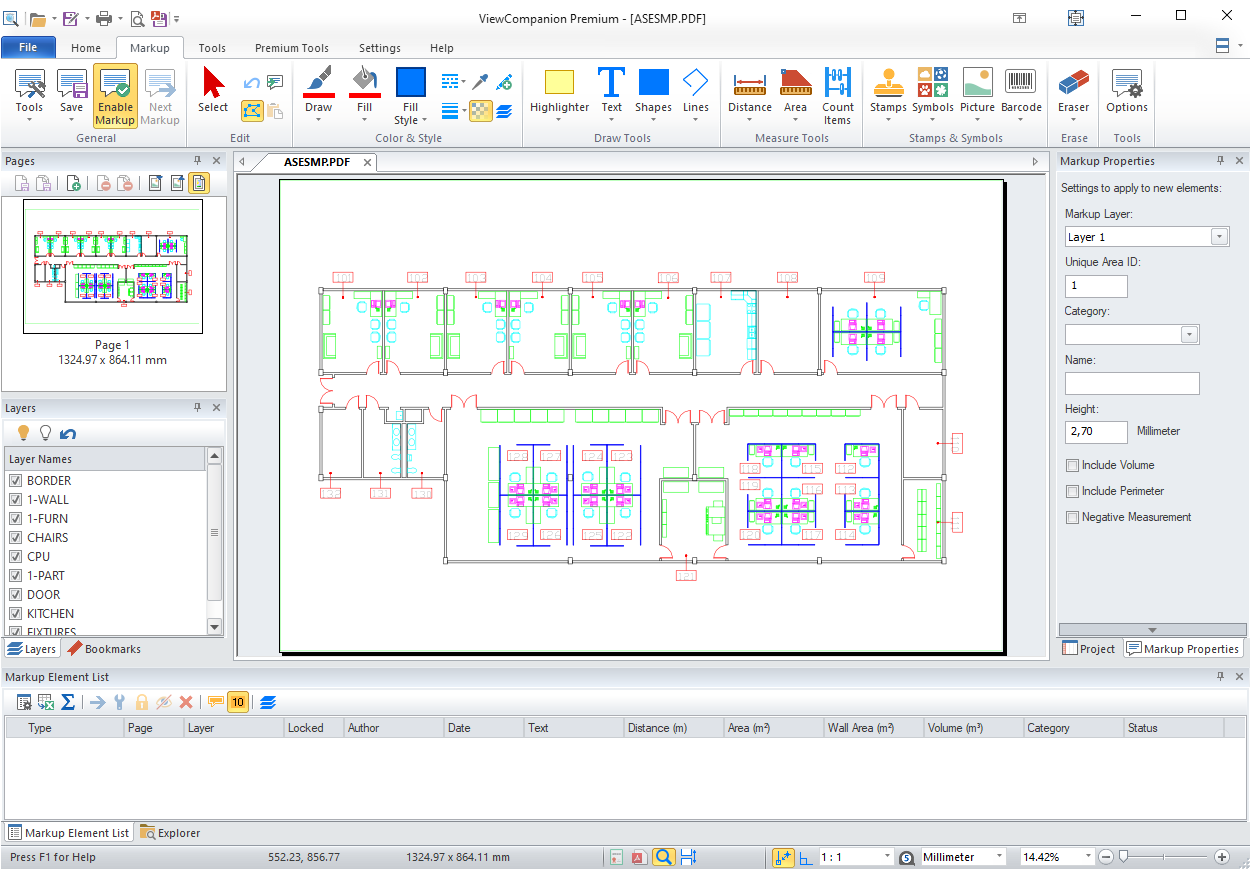
Before you can begin to measure you will need to setup the correct drawing scale. The floorplan above was created with a 1:40 scaling and this is as you can see selected in the
status bar at the bottom of the screen. If the scaling is not displayed somewhere on the drawing, you can also use the calibration tool, please open the help by clicking F1 inside ViewCompanion for more information about calibration.
The measurement unit (metric or us) can be selected in the status bar. For this tutorial we will use meter as our measurement unit.
Just above the status bar you will see a pane named Markup Element List, and when you start to add annotations, they will all be listed here.
Additional information like date, text, area and more will be listed too.
To the right of the screen, you will find the markup property pane. In this pane you can setup additional data that will be added to created annotations.
In the picture above we've setup the height to 2.70 meter.
This value is useful if you want to calculate wall area and volume for added measurement areas.
You can define your own category here as well if needed, and You can use the markup layers to separate annotations,
for example using a layer for net area and one for gross area.
Commonly used tools for takeoff are the measurement area and count tools.
To add a measurement area, you press the Measure button, and then select one of the following tools:
The first tool to the left is used to draw a polygonal area. The tool next to it, is faster to use if you're measuring a rectangular area,
for example a room.
If your drawing is of PDF, DWF or PLT file format you will also be able to make use of snap to drawing geometry for higher accuracy.
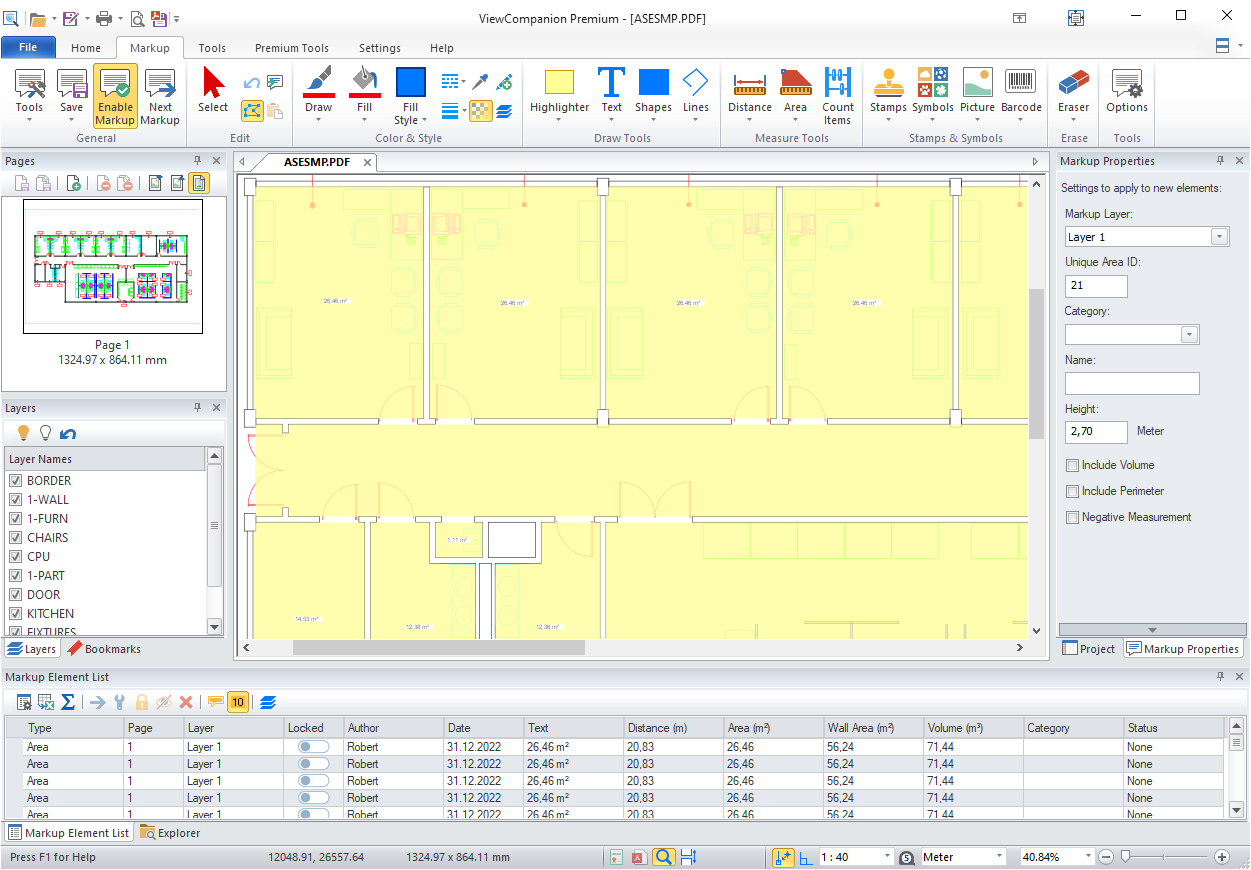
In the picture below we've used the measurement area tools to measure all the different rooms, and the markup list at the bottom will
show information about all the areas.
In addition to the measurement area tools you will also find tools for measuring distances:
- Measurement Line: Measure and display the length between two selected points.
- Measurement Polyline: Measure and display the distance defined by two or more points.
- Dimension Line: A line that displays the length between two points, with arrows/symbols at the ends showing the limits of the dimension.
How to create a report of your measurements
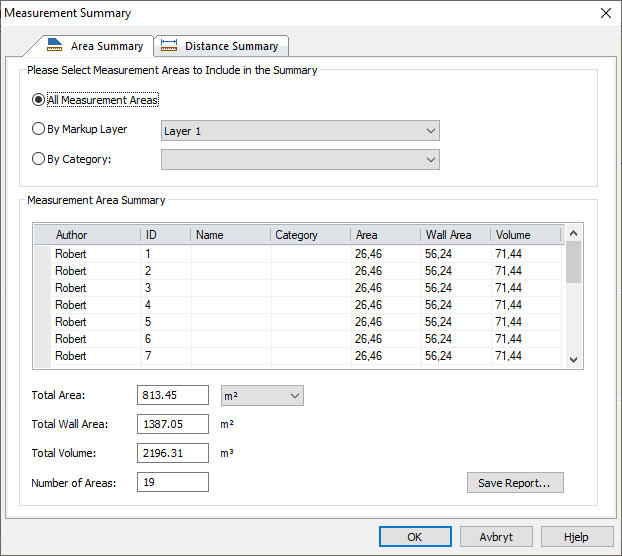
You can check the summary for the measured areas and distances by clicking the Measurement Summary button in the Markup Element List toolbar, this tool has the following icon:
The dialog shown below will then be opened. Here you can see the summary of all the areas based on selection. It is possible to include all measurements,
only those on a specific layer or only those belonging to a certain category.
Categories are user defined, and you can use the Markup Properties settings (see above) to add this information while you add the areas.
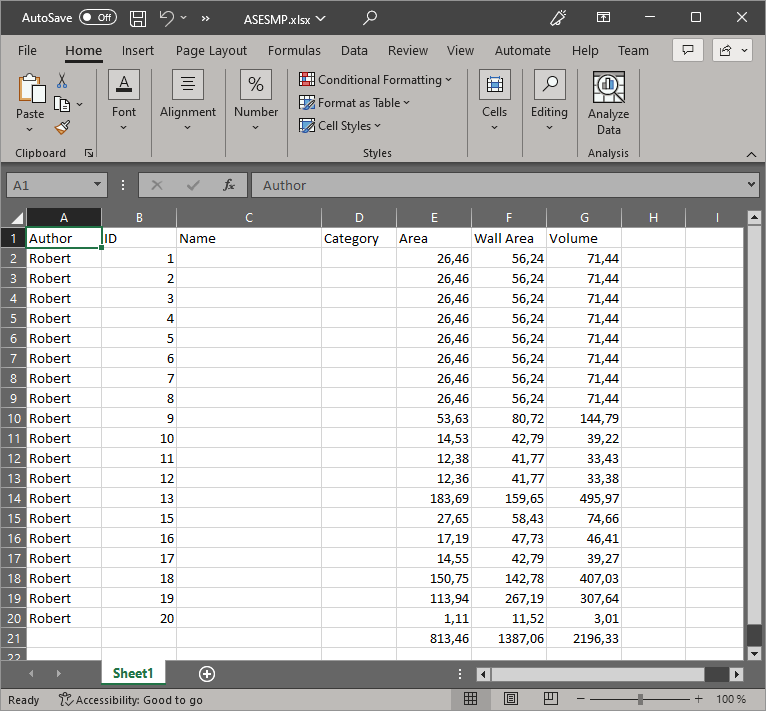
Use the Save Report button found at the bottom right of the dialog to export to Excel and then open the created XLSX file in Excel:
How to count items
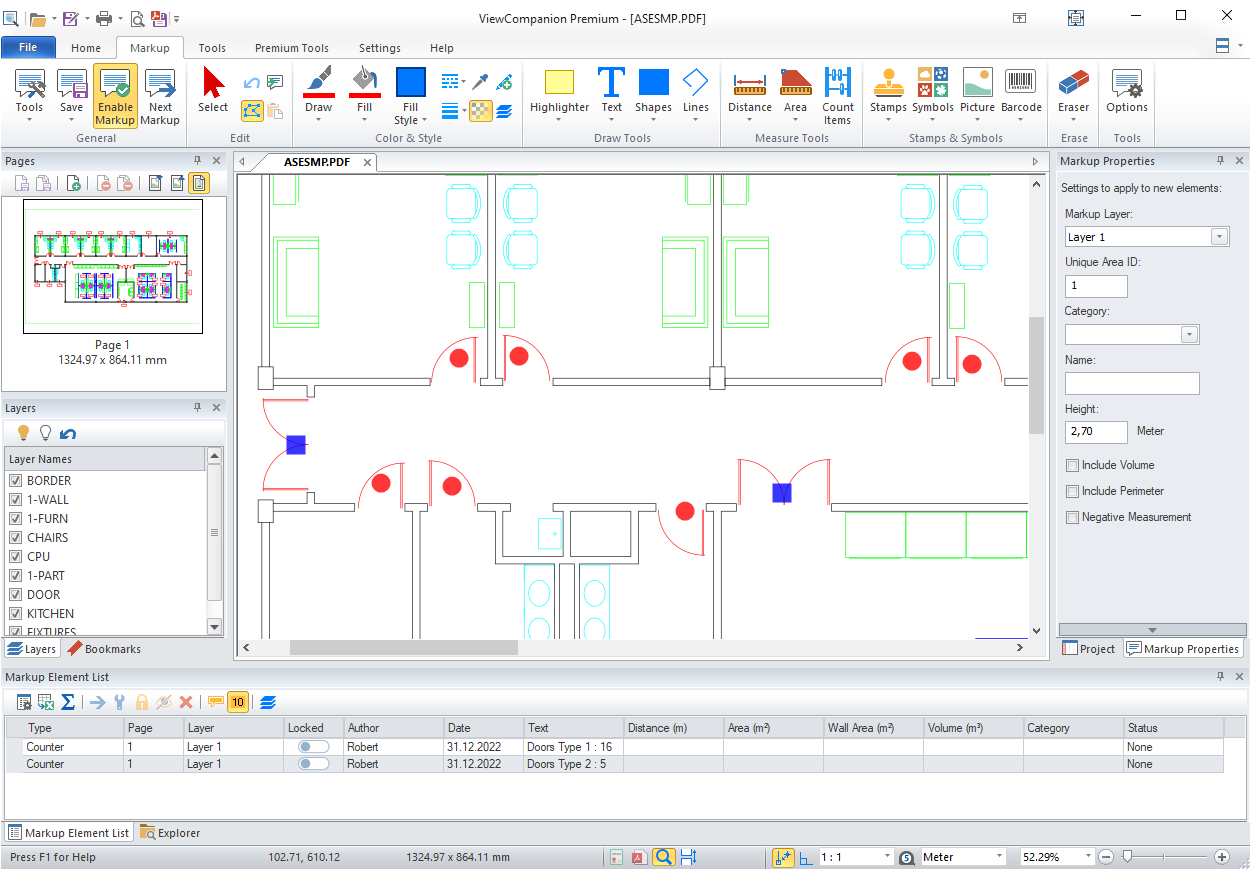
You can use the annotation counter tool to count items in the drawing, for example items like doors or windows.
To start a count, you select the counter tools found in the Markup Tab:
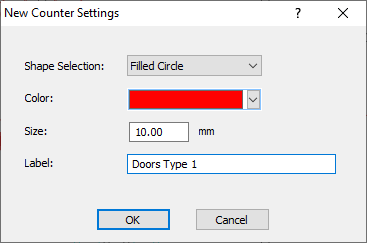
After selecting the counter tool, the following dialog will appear:
By using this dialog you can select the color, shape and size used for the count indicators. You can also add a label that can be used to
identify what you're counting.
In the picture below we've counted two different types of doors found in the floorplan using different colors, shapes and labels:
Information about ViewCompanion
All editions of ViewCompanion can be used to do takeoff as described above, the only difference is the file formats that can be used for takeoff.
Each of them do support popular formats as PDF and DWF.
Read more about the file format support differences here.
You can find more information about other differences between the editions here.
If you want more information about a specific ViewCompanion edition you can look at the following product pages:
ViewCompanion Standard
ViewCompanion Pro
ViewCompanion Premium
Free 30 days evaluation downloads are available for all editions.


